Showing posts with label silver. Show all posts

February 28, 2012

OPI's Pink Friday, Metallic 4 Life, and Fly

So, when I first heard that OPI and Nicki Minaj were pairing up for a set of nail polishes, I thought it was a match made in heaven. With Nicki's personas and brightly colored wardrobe, I knew this would be a set to watch out for. I was unfortunately only able to get 3 out of the 6 colors in the set but I am okay with that for now and I will explain in a moment. The colors I got were Pink Friday, Metallic 4 Life, and Fly.

First up we have Pink Friday which is probably my favorite out of the set. I got this because the pale bubblegum pink is a subtle color for everyday. In some lights in my house, it even blends in with my skintone when the pink isn't as apparent. However, with this being a pale color, it is extremely hard to get smooth even after 3 coats or more. In the picture above, you can see Pink Friday used as a part of a leopard print manicure for Valentine's Day as the center of the spots. The base color is Wocka Wocka from The Muppets collection.


Fly is a creme teal color that I originally was going to skip over but I thought of some interesting nail art to do with it. The basic color is similar to Who Let the Dorks Out from Sephora by OPI's Glee inspired line and it is indeed a pretty close match. The main difference being the creme finish of Fly as opposed to the glittery peacock finish of Who Let the Dorks Out. This polish was a simple 1-2 coats and it turned out incredibly smooth. Be on the lookout for a manicure inspired by Perry the Platypus from Phineas and Ferb in the future thanks to this color. ;)


Now we have Metallic 4 Life, a silver glitter polish set in a semi-transparent black gel. This gives it a distinct gunmetal look and this might rival the upcoming Set in Stone from China Glaze's Hunger Games inspired polishes. I like the medium glitter and it is a very basic glitter polish. A little too much for everyday but I can see this working for dressy occasions. The polish applies well and above you can see what it looks like with two coats on a press on nail.

Overall, I was pleased with the colors I got. Pink Friday takes some practice to apply smoothly but works well for nail art where you're only adding a little bit here and there. Metallic 4 Life and Fly are better for special occasions or if it fits a costume or outfit you are wearing. They are 1-2 coat polishes though. I will be trying Metallic 4 Life over 2 coats of the creme Black Magic by Fantasy Makers to see what that looks like as one coat would probably look amazing.

Would I Buy Again? Probably... While not perfect, I can see myself using these polishes when I travel.

December 2, 2011

Review: OPI Muppets Collection

As some of you may know, a while back I posted a press release about the Muppets Holiday collection from OPI and I am so proud to say that I finally picked it up! I wasn't sure if I was initally going to get the entire collection but on seeing them, I had specific reasons for picking up the colors. The formulation overall is really great but I would suggest layering all of the glitters except Excuse Moi over other solid colors. I will list a few of my suggestions but there are so many more.
Top Row L to R: Wocka Wocka, Animal-istic, Meep Meep Meep, Warm and Fozzie, Designer De-Better, Pepe's Purple Passion
Bottom Row L to R: Fresh Frog of Bel Air, Divine Swine, Gone Gonzo, Gettin' Piggy With It, Rainbow Connection, Excuse Moi
Wocka Wocka - While I initially thought that this should have been the one to be the orangey bronze color, I am really in love with this deep cranberry red. It really looks different in different types of light. As I am typing this at the library, it looks like a deep maroon but when I am at home, it takes on more of the bright red color pictured above. I think that is what makes this red individual. The formula is great as it only took 2 coats on my nails and the surface dried relatively quickly.
Animal-istic - An orangey coral red that has an obvious glitter beneath it. At some angles it looks more like a coral pink and at some it looks more like the firey orange you see above. The thing I can say though is that it is a 2 coat formula and it reminds me of Animal's fur around his face. Despite being a holiday collection, I feel like this color is more suited to Summer and even then, it is one of 3 colors that I would only wear on my toes during those sandal wearing months.
Meep Meep Meep - A slight language warning for a moment... This is what I call "Holy Fuck It's Fuschia". It is a bright cool toned pink that is packed with glitter underneath it. This is another of what I consider "Summer Toe Colors" as it isn't something I would wear on my fingers without a reason such as costuming or evening. However, also doing nail art, I can appreciate certain uses for a bright color such as this and I think it would look amazing underneath OPI's Black Shatter or something similar.
Warm and Fozzie - Probably the solid color that I was most looking forward to and it did not disappoint. Being a Harry Potter fan, I've always been keeping my eye out for that perfect bronze so that I could do Ravenclaw shattered nails. Unfortunately, most of what I've seen have used copper and I've even done that myself with Blue Shatter layered over it. Now, I have something that will make the perfect Ravenclaw nails with the colors from the books.
Designer De-Better - When I first saw this color, I thought it was a metallic silver, but I plesantly found I was wrong. This silver has a warm glow to it, thanks to flecks of orangey copper interspersed through it. This gives the silver a little more depth and warmth and individuality. I would probably still use this as a part of my Slytherin collection though because it will allow for a warm/cool contrase between the green and the flecks of orange.
Pepe's Purple Passion - This is the main color that I was going back and forth on getting. It is s deep grape color with a very subtle glitter in it. In fact, despite how the glitter shows up in the bottle, when the polish dries, it doesn't show up at all. It's a little disappointing. This is one that I would probably use on my toes or with some sort of light Shatter coat to brighten it up. My mind keeps floating to the Silver Shatter but I think the bright purple from Sally Hansen might work as well.
Fresh Frog of Bel Air - The swatch above is a single coat of glitter polish over Fantasy Maker's Black Magic in the solid black. I already spoke a little bit about why I love this polish in my earlier entry but I can't say it enough. This is Slytherin glitter in a bottle. Some colors I suggest layering it over are:
  • Black Magic - Fantasy Makers
  • Mermaid's Tears - OPI's Pirates of the Caribbean: Stranger Tides
  • Stranger Tides - OPI's Pirates of the Caribbean: Stranger Tides
  • Wocka Wocka - OPI's Muppets
  • Designer De-Better - OPI's  Muppets
  • OMB - Nicole by OPI

Divine Swine - One of my top three colors from this set. It is a glitter polish set in a clear gel. It has two different sizes and colors of glitter, small round purple glitter and medium hexagonal silver glitter. It is the same idea of Fresh Frog of Bel Air and Gone Gonzo but with a different color for the small glitter. I bought this because I go to parties and assist in running them as well. Soon, my department is going to be changing and my departmental color is purple so I felt that coordinating my polish with my department would be a fun thing to wear at parties. For fun layer it over:
  • Black Magic - Fantasy Makers
  • Prized Possession Purple - Nicole by OPI
  • San Francisco - Sinful Colors

Gone Gonzo - Wow! How much fun is this turquoise blue glitter? Just like Fresh Frog and Divine Swine the turquoise is the small round and hexagonal is silver. I've layered this over a couple of colors already and had so much fun with it. For fans of Star Trek it is the perfect medical/science blue and can layer over black, grey, red, and blue. I see this color getting quite a bit of use on holidays such as Memorial Day, Veteran's Day, and Independence Day but it's also a very fun color for the toes when you want quite a bit of sparkle. Suggested pairings include:
  • Swimsuit... Nailed It! - OPI's Miss Universe
  • Black Magic - Fantasy Makers
  • OMB - Nicole by OPI
  • Wocka Wocka - OPI's Muppets
  • Designer De-Better - OPI's Muppets
  • Warm and Fozzie - OPI's Muppets
  • Copper Penny - Revlon
  • Who Let the Dorks Out? - Sephora by OPI
Gettin' Piggy With It - While on the surface this looks like a red version of the other glitter polishes I was very happy to see that in addition to the larger hexagonal silver, it had larger hexagonal red glitter mixed in with the small round. This is going to be a perennial favorite of mine during football season due to the scarlet and grey being my hometown team. It also would make a great pairing over blue polishes for Independence Day. I also think of ruby slippers when I see this and when put over a red polish although the glitter is a bit less obvious, the light glints off of it just right. Pair it with:
  • Black Magic - Fantasy Makers
  • OMB - Nicole by OPI
  • LilyChrome - Revlon
  • Designer De-Better - OPI's Muppets
  • Wocka Wocka - OPI's Muppets
  • San Francisco - Sinful Colors
  • Swimsuit... Nailed It! - OPI's Miss Universe
  • Steady as She Rose - OPI's Pirates of the Caribbean: Stranger Tides

Rainbow Connection - How beautiful is this? It is a multi-colored glitter with both small round an larger hexagoal glitters in all of the colors. I bought this specifically for New Year's as it reminds me of the fireworks and also of the ball dropping in Times Square. This is a very hard polish to match with a color underneath so I suggest keeping it dark and neutral like the Black Magic pictured above. That way, each and every color pops and none of them get lost in the shuffle.

Excuse Moi - This is the only glitter polish that you do not have to layer over a solid color. Instead of a clear gel, you have the nice light, bright pink that you see above. The other thing that makes this pink individual is that in addition to the pink and silver glitter, you have flecks of gold and green. Out of all of the Miss Piggy inspired colors, I think this sums her up in a single polish. That's not to say I don't like the others but I can definitively see that this is Miss Piggy on first glance. The first coat was easy to work with and this is the first time I can say I love a pink like this.

To sum everything up:
Pros - You can see where the majority of the colors take from their inspirations. I would have switched around a couple of names but that has nothing to do with my love of the colors. These colors for the most part would also be amazing for that holiday party that you go to but also there are plenty of classic colors that you can get away with wearing everyday. My favorites are:
  • Wocka Wocka
  • Excuse Moi
  • Fresh Frog of Bel Air
  • Warm and Fozzie
Cons - One of the colors doesn't even show its glitter finish and the color itself is quite dark for fingers. Not too many points off for this but it's something that hit me when trying these out.

Would I buy again?  Yes.


Quintessential Color: OPI's Fresh Frog of Bel Air

Okay, I never thought I would find another color that was more quintessentially Slytherin than San Francisco from SinfulColors but OPI has now proven me wrong.

Fresh Frog of Bel Air from OPI's Muppets collection is small round bright green glitter with larger hexagonal silver glitter in a single polish! While the larger glitter can be somewhat harder to work with, it just takes practice and a good base color underneath it. In the picture below, I have a single coat of Fresh Frog over Stranger Tides from OPI's Pirates of the Caribbean collection.

To highlight the glitter, I took this picture with flash. Other colors I suggest as base coats for this polish are:
  • San Francisco - Sinful Colors
  • Mermaid's Tears - OPI
  • Black Magic - Fantasy Makers
You can also go with blues but I think the above make the glitter pop even more.

August 16, 2011

Experiment: Home Made Lipgloss/Balm From Eye Shadow

So, today I decided I would try my hand at tinted lip balms using some of my favorite eye shadow shades. I knew some of these would rarely if ever be put on my eyes but they are lip safe so I figured why not make glosses out of them? I found something that is lip safe and it actually protects your lips from chapping a drying. It's Vitamin A & D ointment! The main downfall of this is the fact that it has Petrolatum and therefore tastes like Petroleum jelly. The smell however does fade pretty quickly. The other issue is pooling but I like that effect sometimes.

Okay first of all, I am using Geek Chic Cosmetics eye shadows for this project.

First off was N7, and I really like how this turned out. I wanted to try for a little bit more color but I made the batch too big. However when this goes on it does enhance my lip color just a little bit. It also has a subtle silver sparkle to it as well despite not having much of the red.

N7 on my lips as a gloss.
Next up is Purity Burns, which is a metallic and uber-glittery silver. I /really/ love this gloss because it will add sparkle and shine to just about anything I put it over. With iridescent glitter galore, this gloss would be perfect for any ice elemental or snow queen.

Next up is Eyes of the Werewolf. An amazing copper with an amazing glitter. Works pretty much the same as Purity Burns.

Mmmmm Blood Bond. This deepens my lip tone a bit which will be great over red or brown lipstick to warm it up a bit. It also has a great glitter like Purity Burns and Eyes of the Werewolf.
Viking King, antique gold with lots of glittery pay off and the glitter shows in the gloss.
These are all of the glosses I've made thus far. I'm thinking of mixing up a shade a week using various lip safe eye shadows as pigment. Next week, we'll have Continuum and possible Sleeping Bucket from Geek Chic and I know I would love to turn their Glitter Grenades into a glitter-packed gloss.


July 14, 2011

EotD: Cunning and Wit

So, I originally thought I would have time to do an entire week of Harry Potter inspired eyes and looks but unfortunately real life got in the way (Curses!). I did, however, want to do a Slytherin inspired look at the very least as this is my house. I take pride in this. Also with the quality of the Fang Banger's Quartet from Geek Chic Cosmetics and in this case, Purity Burns. I knew it was the best color for this.

On my eyes:

  • Geek Chic Cosmetics Eye Shadow - Purity Burns
  • Wet n' Wild Color Icon Trio - I Dream of Greenie (Browbone and Crease colors)
  • Maybelline mascara in Black

I first started with the crease color from my Wet n' Wild trio along the lash line. Then I went over it and covered the main part of my lid with Purity Burns from Geek Chic Cosmetics. Then I put the browbone color from the same trio in the crease and blended upward and into the inner corner of my eye to highlight.

Then I finished with the mascara.

A relatively simple look but still something I wanted to share.

June 30, 2011

EOTD: Codex, the Healer

Do you know anyone addicted to an MMO? Are you that person? Either way, the hijinx of The Guild is for you. This wacky webseries follows the misadventures of members in an in-game guild as they band together in real life.

This EotD was inspired by the guild healer, Codex, as played by Felicia Day. While the colors aren't an exact match, I feel that it captures the feel of the character as well as accenting the eye in just the right way.

For the color on my eyes, I used the above trio, Spoiled Brat by Wet n' Wild. As always I primed my eyes with Too Face Shadow Insurance as well.

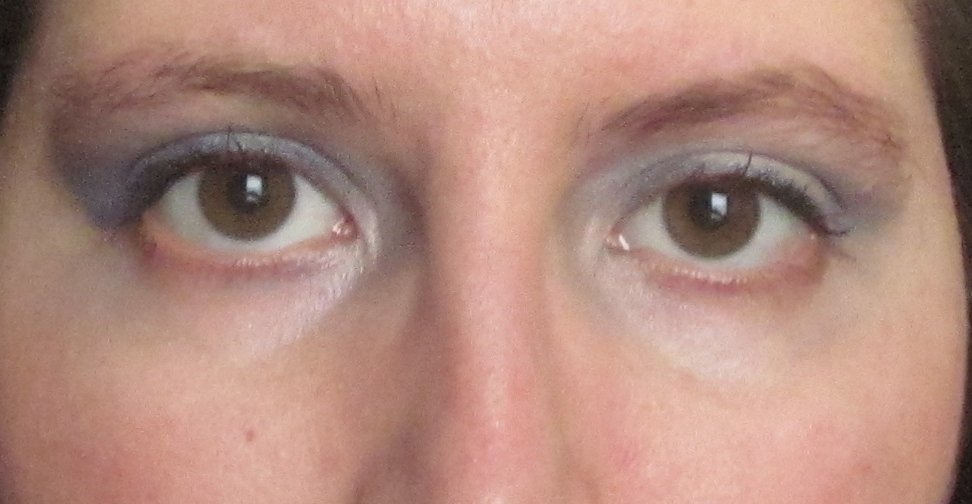
First, after priming my eyes, I patted the browbone color, which is a shimmery silver on the inside half of my eyelid. I didn't go too far up my browbone because I am doing half and half color. I also applied some of the silver on my lower lash line.

Then, I took the eyelid color, which is the bright deep pink and patted it on the other half. You don't want to blend the main pink too much or else it will fade the color and it may look more like an irritation than an awesome color. I blended by just patting a small amount of the silver over the middle line.

Then, I took a small brush and the sparkly black crease color and lined my lash line with it to give it a little bit of that smoky look.

The look was finished off with MAC False Lashes mascara on the upper lash line.


These photos taken in natural light. I will have photos with flash ASAP.

Swatches: Wet n' Wild Color Icon Eyeshadow Trios

So this is to supplement my previous review. Just thought I would post photos of some swatches in natural light.
L to R in natural light: I Dream of Greenie  the Eyelid, Crease, and Browbone colors.

L to R in natural light: Spoiled Brat Browbone, Crease, and Eyelid colors.

Spoiled Brat's colors made me instantly think of Codex from The Guild as her costume colors are predominantly a deep pink, white, and gold so I would subtitute the silver in for the white and probably use the black as a liner. This is probably going to be my next Eye of the Day as well. 

Also Note: These photos are swatches without primer. When I do my eyes, I always use a primer and my primer of choice at the moment is Too Faced Shadow Insurance. It increases the vibrance of the color and also increases wear time.

June 15, 2011

EOTD: Sapphire Stardust

A very simple eye that can be layered to become more daring. Silver fades to a deep blue and eyes lined with a bright blue liner.

Items Needed:

  • TooFaced Shadow Insurance
  • Jane Zingers in Hi-Ho Silver
  • L'Oreal Palette in Sapphire Sea
  • Isadora Eyeliner in Blue
  • MAC Pro Longwear Mascara in Jet Black
I started off with Too Faced Shadow Insurance. Now that I have it, I swear by it. And it really did help in the application of my eyeshadow.

Next, I patted on Jane Zinger in Hi-Ho Silver. I also dabbed some on the inside corner to add some sparkle there.

Now, I took the dark blue color from my Sapphire Sea duo by L'Oreal and put the blue on my outer corner and in my crease. Then, I lined my lashline with my Isadora blue eyeliner and flared it up at the corner.

Then, I applied 2 layers of MAC Pro Longwear Mascara in Jet Black to get a full lash look.